


Intro
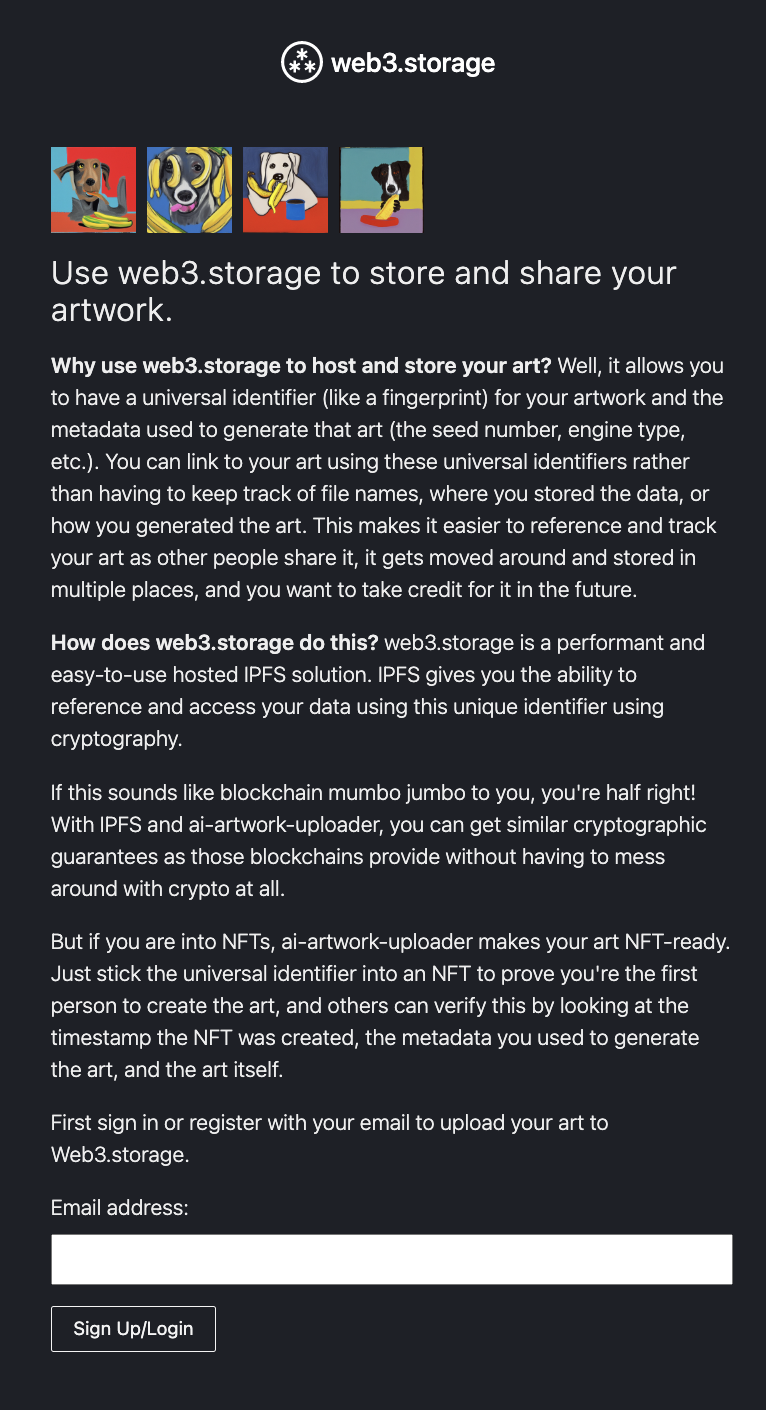
We wanted to make it easier to upload and share AI artwork utilizing the distributed nature of IPFS and web3 storage. Here's how we built it.
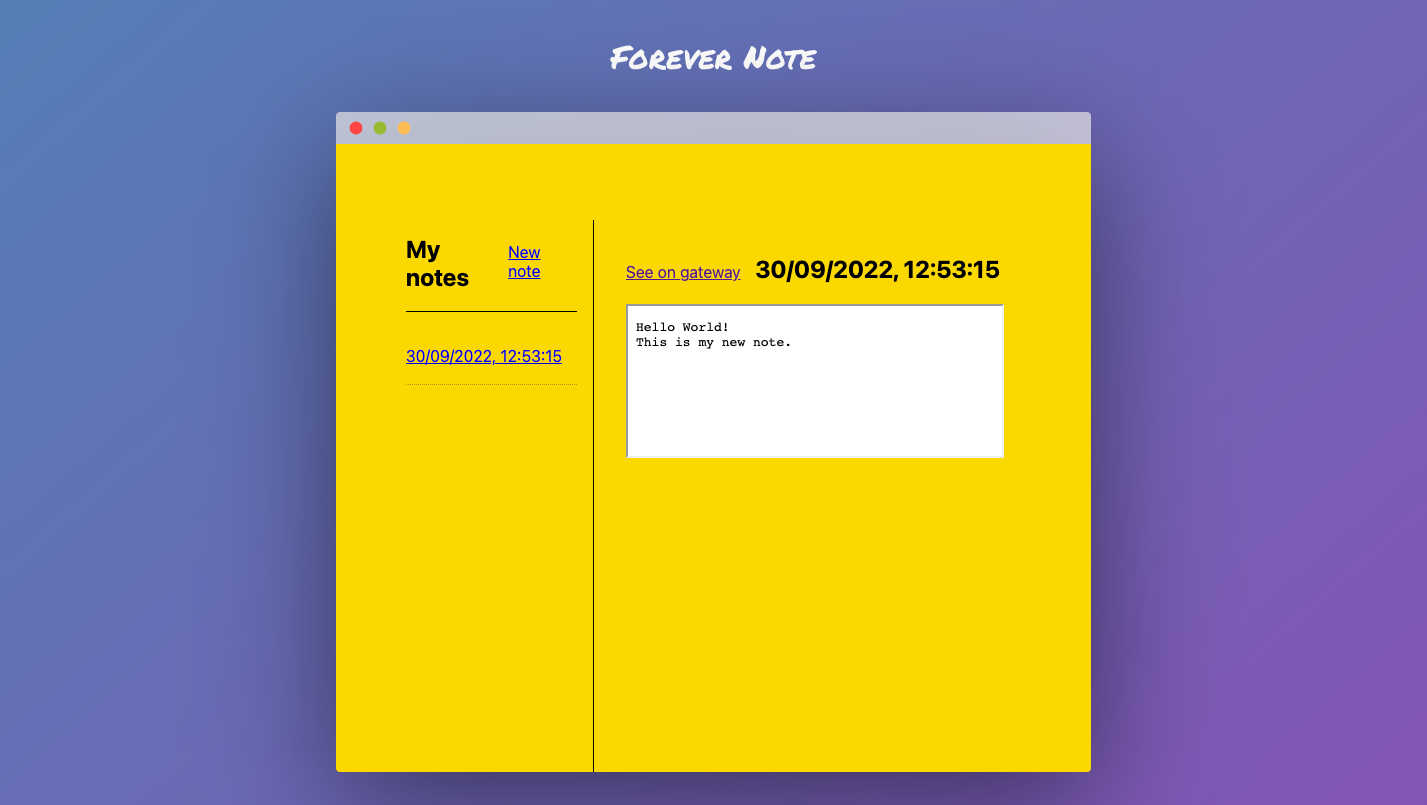
The app allows images and metadata of generated artwork to be uploaded to the IPFS with a gallery index file that pulls it all together as a shareable asset. This is especially important because an immutable record of the metadata allows the source images to be generated again from the same model. Tracking the metadata means these galleries can serve as a jumping off point for further exploration, as well as tracking the origin of images so NFTs and other works can easily link to the original model outputs.
This is possible thanks to a few essential tools: w3up, w3ui, and UCAN. UCANs (User Controlled Authorization Networks) are a powerful new way for people to authorize and control access to their data. Think of it as a decentralized and more customizable OAuth.
w3up is a service provided by Web3.Storage that implements UCANs and file upload to IPFS. With w3up you can create and manage your UCAN identities. w3up makes it simple to upload files to IPFS, even from a web browser.
Finally, w3ui is a collection of headless Javascript UI components that use w3up. In this demo, we'll be using the vanilla JS w3ui examples, but other examples for popular UI frameworks such as React, Svelte, and Vue exist.
The app is a pure browser app using vanilla JS to reduce any reliance on third-party dependencies to showcase the power of w3ui. w3ui handles all the logic around user authentication and file upload/management - the app simply adds/removes web component templates to reflect the state. The code for the app lives in this GitHub repo. And you can access a demo of the app following this link.
Authentication
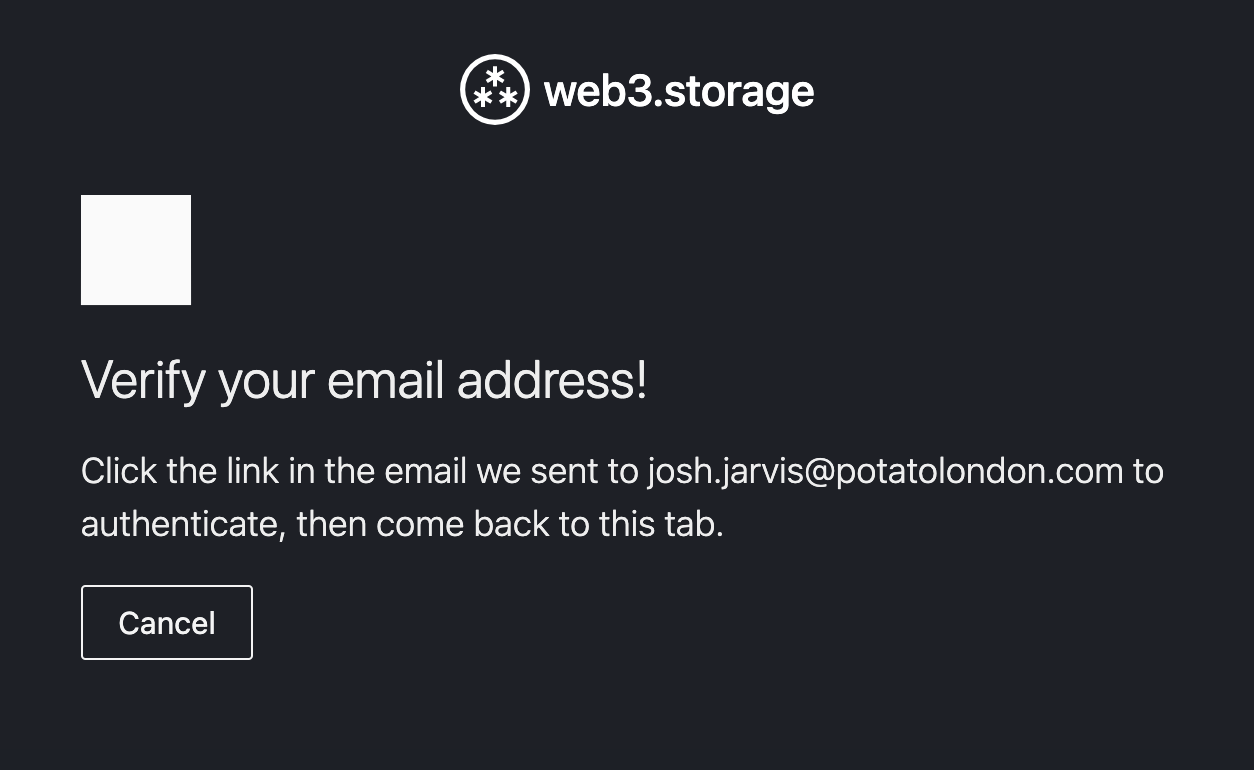
Authentication is handled by w3ui keyring, which utilizes the capabilities of UCAN, and w3up with Magic Link so no passwords need to be managed.
Here's the annotated code block that achieves this.
import {
  createIdentity,
  registerIdentity,
  sendVerificationEmail,
  waitIdentityVerification,
  storeIdentity,
} from '@w3ui/keyring-core'

const fd = new window.FormData(e.target)
// log in a user by their email
const email = fd.get('email')
this.email = email
let identity
let proof

// If the email input is valid...
if (email) {

  // Create a new identity
  const unverifiedIdentity = await createIdentity({ email })

  // This returns the DID, we can log this out.
  console.log(`DID: ${unverifiedIdentity.signingPrincipal.did()}`)

  // Finally we can send the verification email using magic link to log the user in.
  await sendVerificationEmail(unverifiedIdentity)
  const controller = new AbortController()

  // Show the verification component.
  this.toggleVerification(true);
  try {
    // This will resolve once the identity has been verified.
    ({ identity, proof } = await waitIdentityVerification(
      unverifiedIdentity,
      {
        signal: controller.signal
      }
    ))
    await registerIdentity(identity, proof)

    // And we can store this identity to use it later
    await storeIdentity(identity)
    this.identity = identity

  } catch (err) {
    // Oh no! Lets log the issue an reset the email field.
    console.error('Registration failed:', err)
    this.email = null

  } finally {
    // Show the confirmation component.
    this.toggleConfirmation(true)
  }
}
The Upload
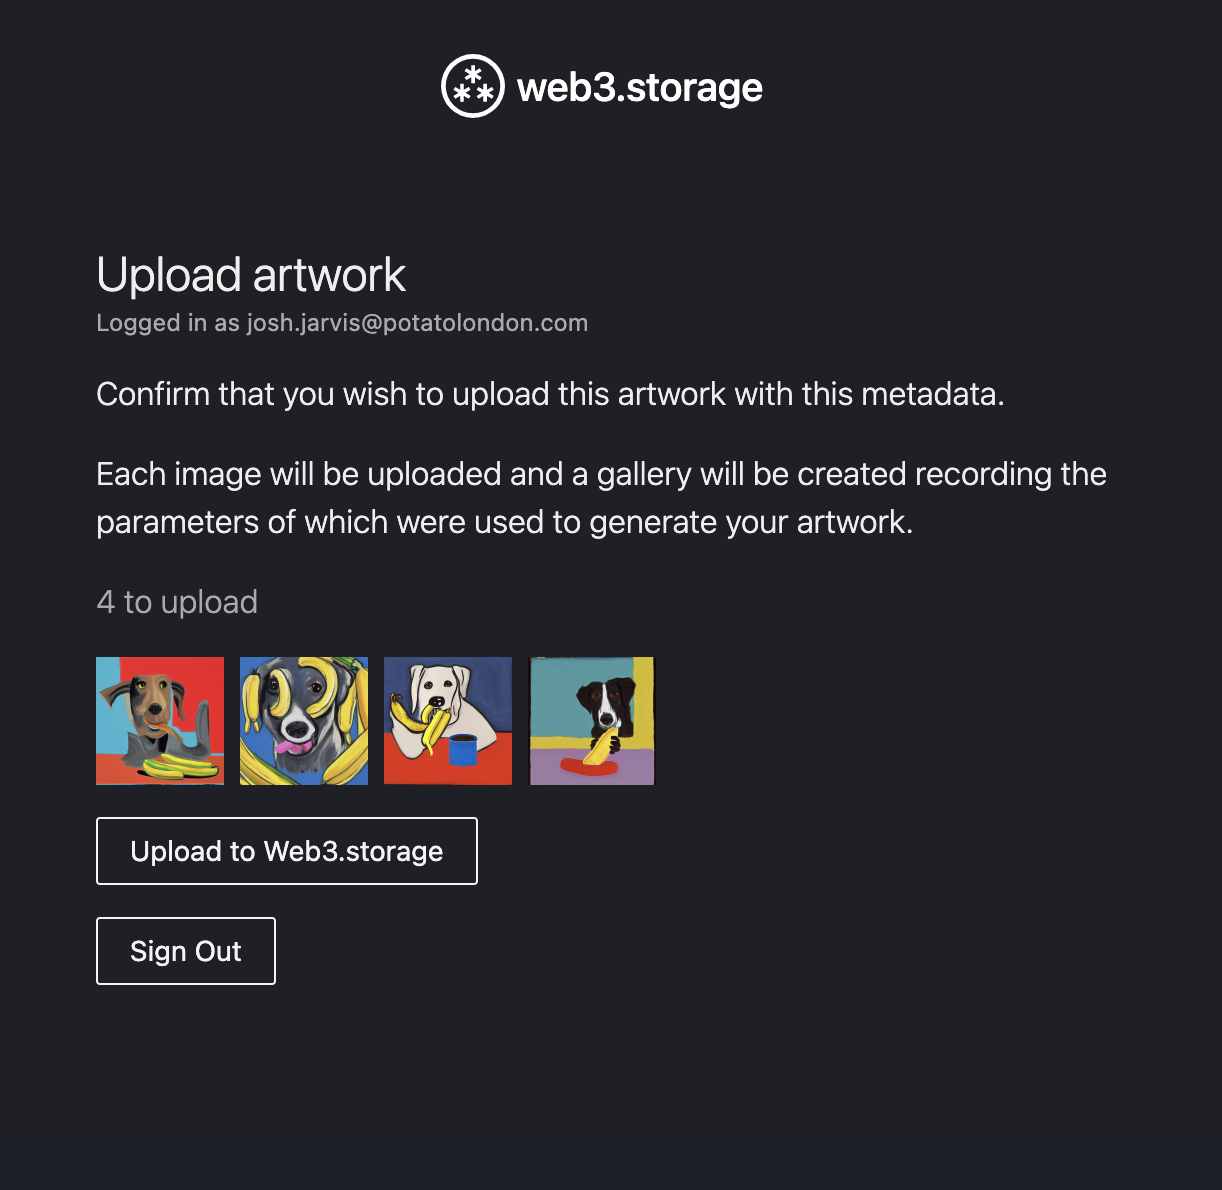
Next, we take the uploaded images from the URL parameters and upload these to web3.storage. We also create a contact sheet index.html that lists all uploaded images and the metadata, this allows us to link to the uploaded folder with the CID and this file will be displayed as the landing page.
w3ui provides utility functions that will help us. We use the encodeFile function to convert our in-memory file into a CAR file. Note that one could also upload a folder containing multiple files with the encodeDirectory function.
Notice how encodeFile also returns the CID of our file! A content identifier, also known as a CID, is a unique value used to identify files stored on the IPFS network.
Here's the annotated code block, bare with us, it's a big one!
import {
  loadDefaultIdentity
} from '@w3ui/keyring-core'

import {
  encodeDirectory,
  encodeFile,
  chunkBlocks,
  uploadCarChunks
} from '@w3ui/uploader-core'

uploadFiles () {
    // Fetch the upload data, this is the image urls and metadata.
    const {
      imageURLs,
      parameters,
      description
    } = this.uploadData

    if (imageURLs.length > 0) {
      // Upload each image to IPFS using w3ui
      const imageBlobsPromise = Promise.all(
        imageURLs.map(async (url, index) => {
          try {
            // Get the image and generate a blob from the URL.
            const response = await fetch(url)
            const blob = await response.blob()
            const file = new File([blob], `${index}.png`)

            // Encode the file to upload it
            const { cid, blocks } = await encodeFile(file)
            const chunks = await chunkBlocks(blocks)
            await chunks.next() // Need to tap into stream in order to get the CID
            const CID = await cid
            return { file, CID, url }
          } catch {
            return undefined
          }
        })
      )

      // Upload the metadata from the generated artwork as a separate JSON file.
      // This is a similar flow to the previous image blobs.
      const uploadJSONMetadata = async (description, metadata) => {
        const str = JSON.stringify({
          description,
          ...metadata
        })
        const bytes = new TextEncoder().encode(str)
        const blob = new Blob([bytes], {
          type: 'application/json;charset=utf-8'
        })

        const file = new File([blob], 'metadata.json')

        try {
          const { cid, blocks } = await encodeFile(file)
          const chunks = await chunkBlocks(blocks)
          await chunks.next() // Need to tap into stream in order to get the CID
          const CID = await cid
          return { file, CID }
        } catch {
          return undefined
        }
      }

      const upload = async () => {
        // Fetch that identity we stored in the Authentication step.
        const identity = await loadDefaultIdentity()

        // Grab the image blob and metadata JSON upload promises so we can await them later.
        const imageBlobs = await imageBlobsPromise
        const metadataBlob = await uploadJSONMetadata(description, parameters)

        // Render a HTML contact sheet, `renderHTMLContactSheet` simply returns the parsed boilerplate code.
        const indexHTML = this.renderHTMLContactSheet(imageBlobs, metadataBlob, parameters, description)

        // Create a blob from this contact sheet HTML
        const blob = new Blob([indexHTML], {
          type: 'text/plain;charset=utf-8'
        })
        const indexHTMLBlob = new File([blob], 'index.html')

        // Encode the HTML blob to prepare it for upload.
        const { cid, blocks } = encodeDirectory([indexHTMLBlob, metadataBlob.file, ...imageBlobs.filter(blob => blob).map(blob => blob.file)])

        // Chunk and upload the CAR for all the blobs, this is the index html, metadata json and images.
        await chunkBlocks(blocks)
        await uploadCarChunks(identity.signingPrincipal, chunkBlocks(blocks))
        const CID = await cid
        this.rootCID = CID

        // Finally we can update the UI to show the complete component!
      }
    }
  }

Conclusion
Finally we're able to upload all of the generated artwork separately and have a handy contact sheet with all the images and metadata that makes it easy to share across platforms.
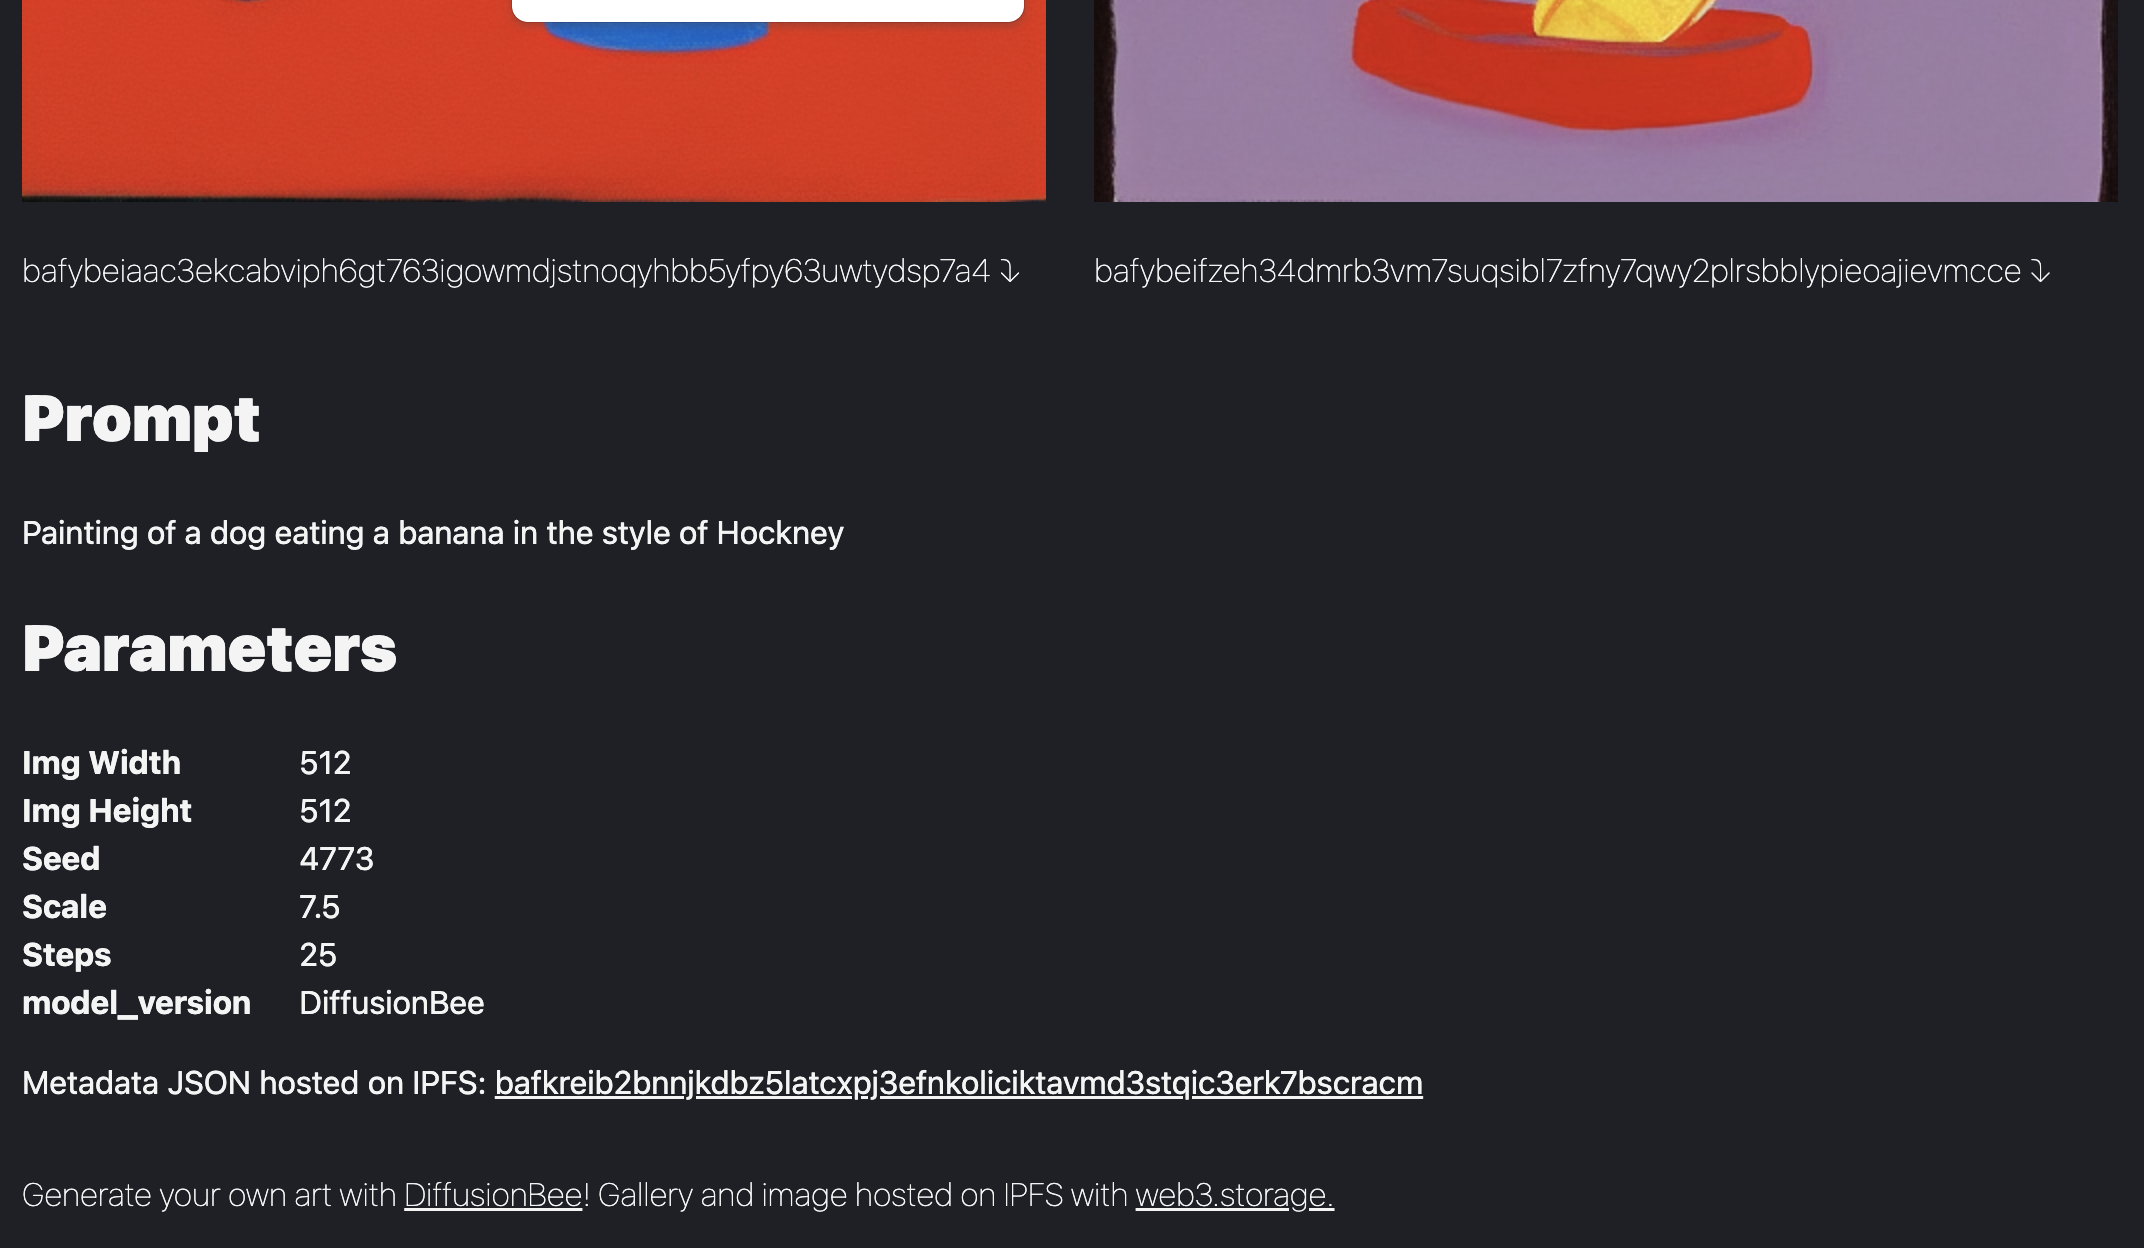
Our next steps are integrating this work with another stable diffusion UI repo. We've got an example of integrating with DiffusionBee, you can see and run this on our fork of the repo here.

