


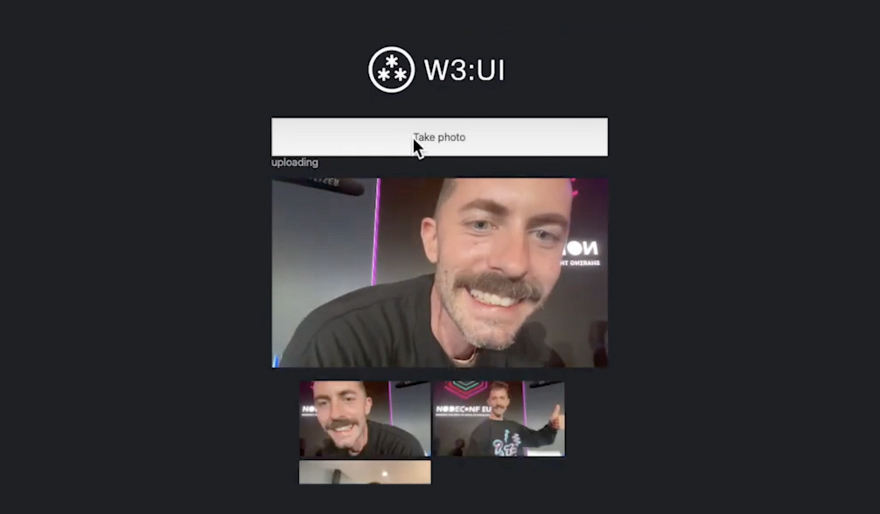
At NodeConfEU 2022 we unveiled W3:UI beta at our "UCAN Build Apps with IPFS" workshop (You can watch the full video here). The workshop included two code "challenges". Today we will be working on the front-end challenge, which will look like this when we're done:
Update: This post was updated in January 2023 to reflect changes made during the beta development cycle. See our announcement post for more information about the changes in beta v2.
What we're building
In this tutorial we'll be using web3ui components to create a selfie app 💅📸 that allows users to take selfies, upload them to IPFS, and display them. Check out the demo.
This tutorial is apt for total beginners and should take about 20-30 minutes to complete depending on your familiarity with the relevant tools.
Overview
There are four basic steps in this tutorial:
1. Set up our framework and environment
2. Copy the file-upload example app into our framework
3. Modify the example by adding a camera and uploading the selfies 💅📸 we take
4. Display our uploads 🤩
If you are already familiar with creating web apps or want to BYOF (bring your own framework) you should skip ⏭️ step 1.
Set up framework
While w3ui is framework-agnostic, we made a few choices for the purposes of this walkthrough; you may want to make different decisions for your use case. We will use React with NextJs and Vercel for hosting. All have excellent documentation, but feel free to get in touch if you get stuck!
Create Next App
To create a new project with Create Next App, Open a terminal, navigate to where you want to keep your app code and run:
yarn create next-app
Enter your project's name when prompted. To follow along precisely with this tutorial, select No when asked if you want to use TypeScript or ESLint. When it's finished run:
cd {your-project-name}
yarn dev
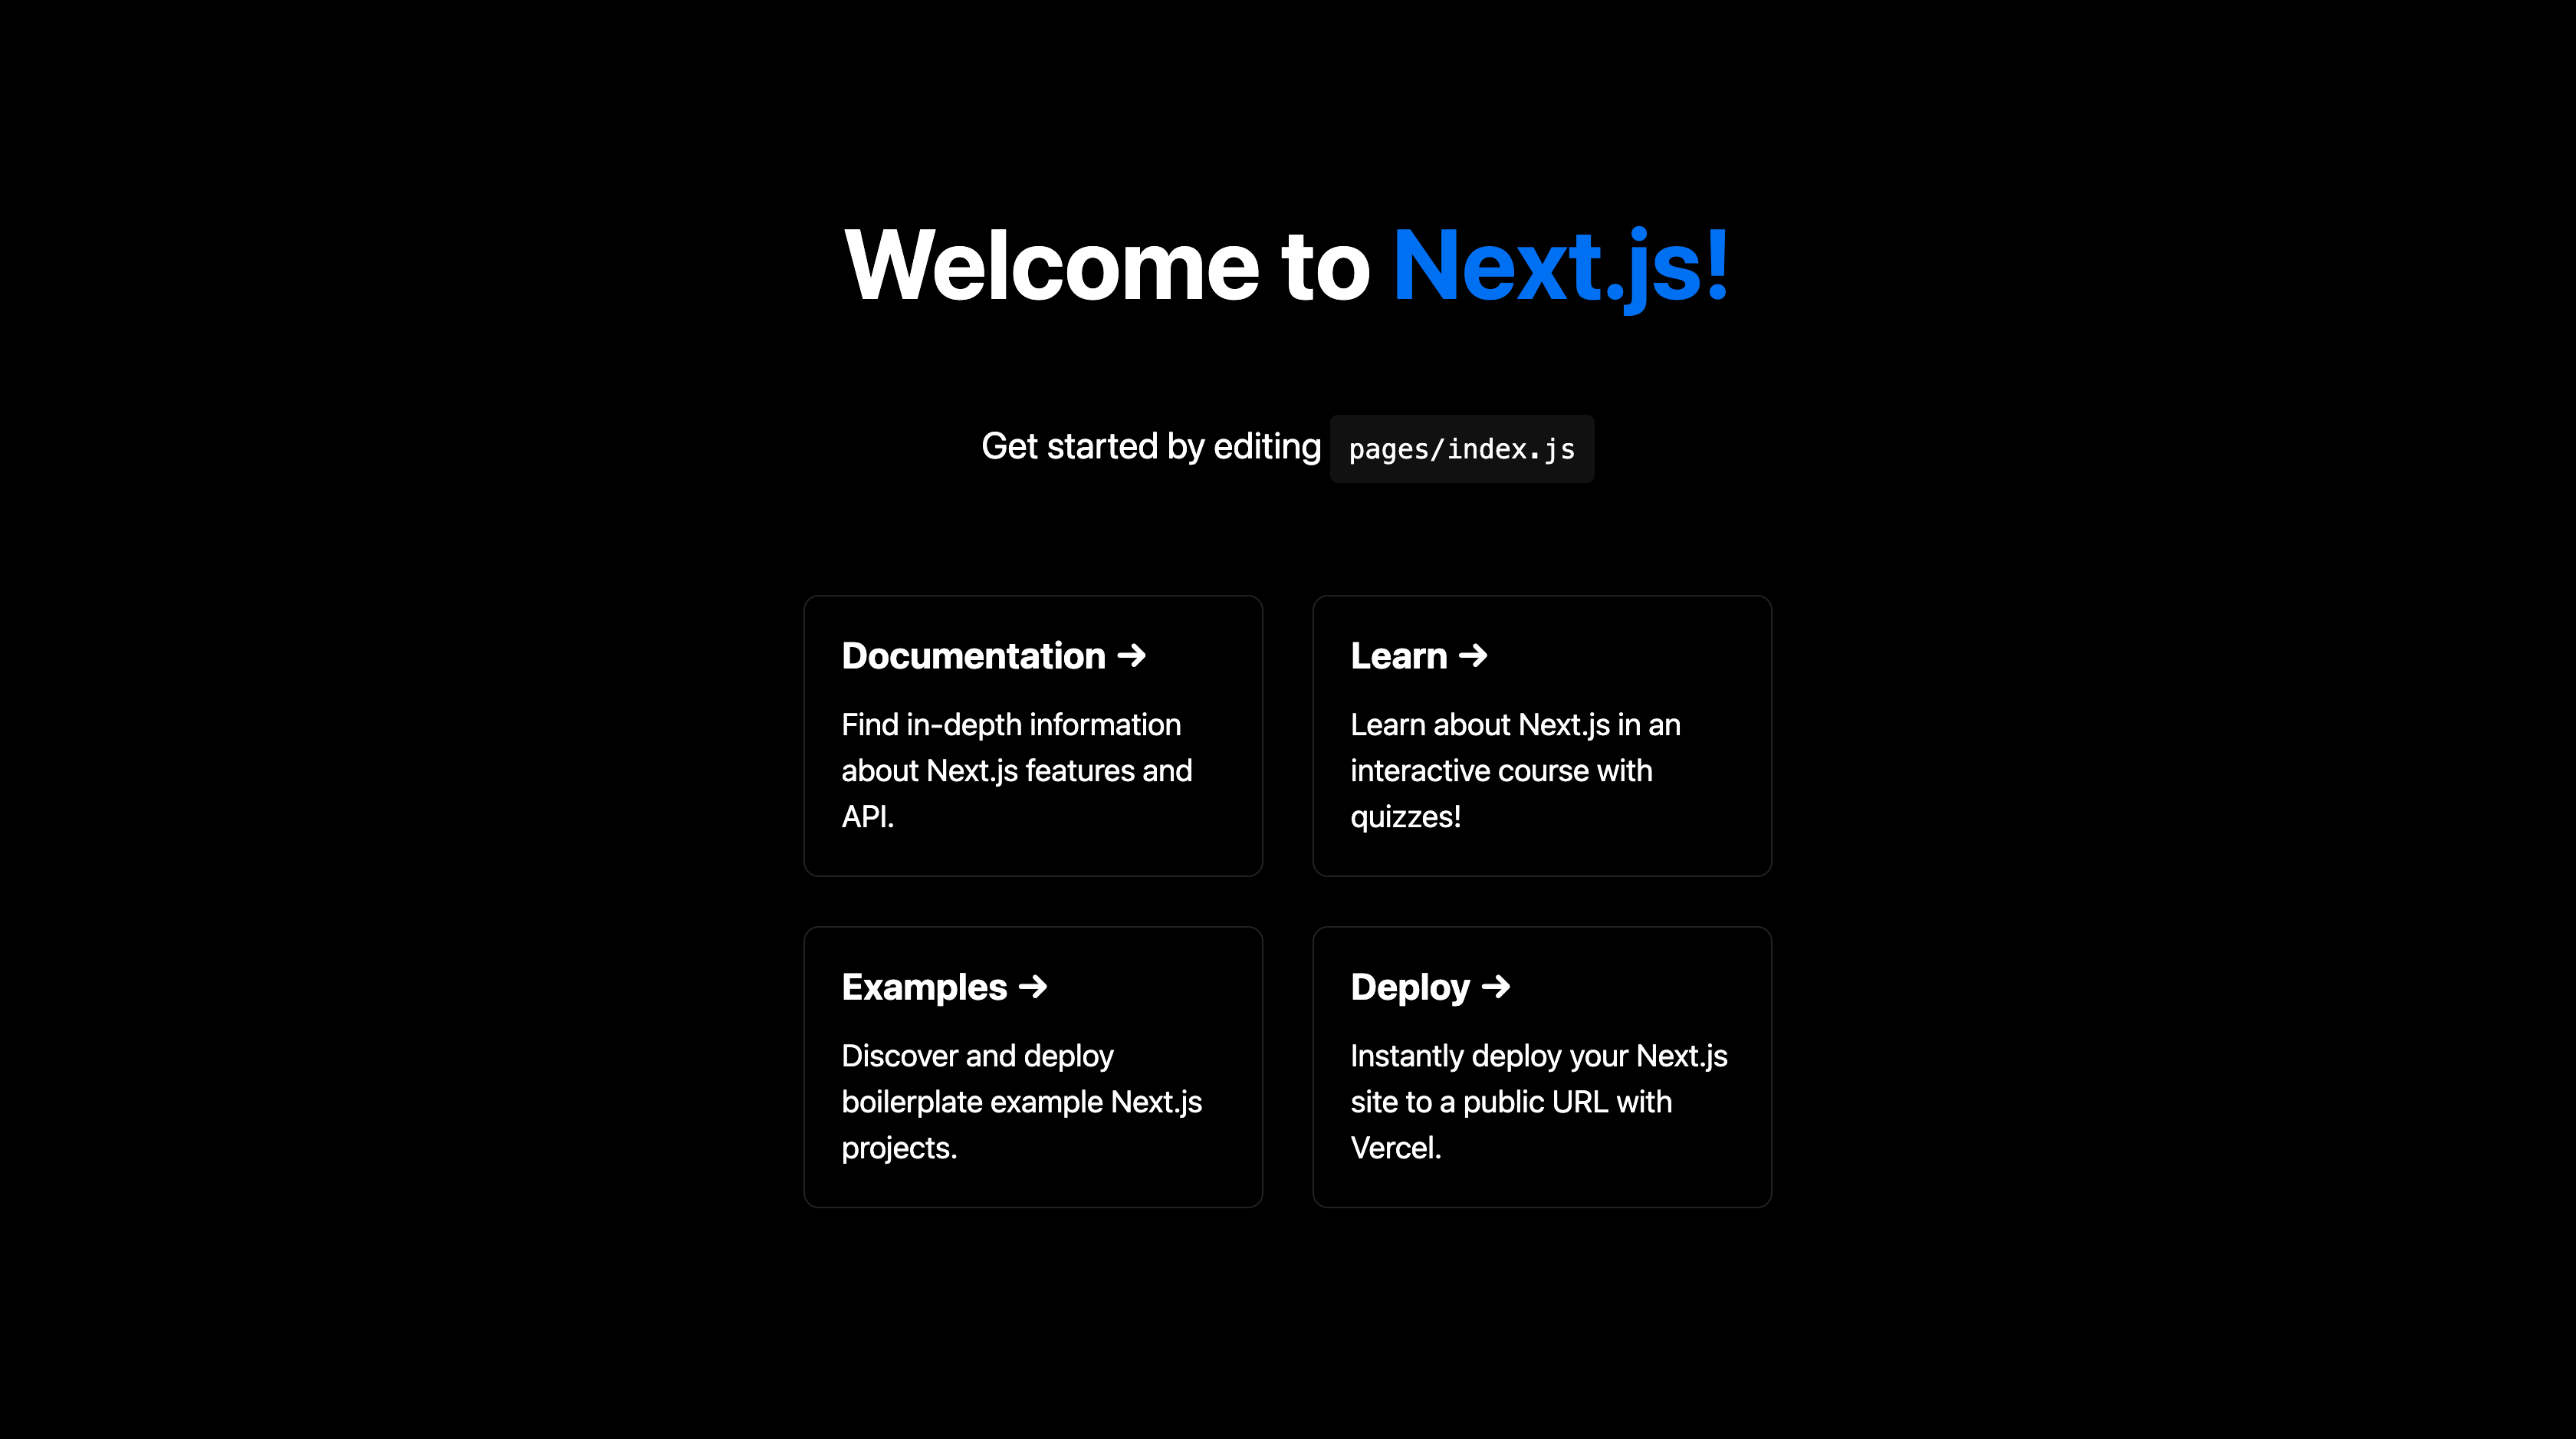
Open your browser and you should see something that looks like this on localhost:
One last chore: The recent release of Next.js 13 (at the time this blog is written) includes a change that does not play well at present with our project. Go to next.config.js and update your config to include
swcMinify: false
Copy the file-upload example app
To begin go to GitHub and take a look at the example code. In this directory are all the files we are going to use as the basis for our selfie app 💅📸
App.js
We need to merge App.js from the example project into our new project's _app.js, making some slight adjustments--we need to add the Next AppProps that App receives and return Component (the current page) rather than ContentPage. You can simply copy the code given below and paste it into _app.js
import { useEffect } from "react";
import { KeyringProvider, useKeyring } from "@w3ui/react-keyring"
import { UploaderProvider } from "@w3ui/react-uploader";
import logo from "./logo.png";

import "../styles/globals.css";

function App({ Component, pageProps }) {
  return (
    <KeyringProvider>
      <UploaderProvider>
        <AgentLoader>
          <div className="vh-100 flex flex-column justify-center items-center sans-serif light-silver">
            <header>
              <img src={logo} width="250" alt="logo" />
            </header>
            <div className="w-90 w-50-ns mw6">
              <Component {...pageProps} />
            </div>
          </div>
        </AgentLoader>
      </UploaderProvider>
    </KeyringProvider>
  );
}

function AgentLoader ({ children }) {
  const [, { loadAgent }] = useKeyring()
  // eslint-disable-next-line
  useEffect(() => { loadAgent() }, []) // load agent - once.
  return children
}

export default App;
If you had the example running at this stage, you will see that it broke 😫 We need to install our w3ui components!
yarn add @w3ui/react-keyring @w3ui/react-uploader
The keyring and upload providers give the app access to state and actions related to authentication and files being uploaded to web3.storage... Still broke! 😫😫
To fix: Copy logo.png into the /public folder, which is where Next.js serves static assets. Then, go into _app.js, remove the import of logo, change the value of src on the <img> tag from {logo} to "/logo.png" so it looks like this:
<img src="/logo.png" width="250" alt="logo" />
The app should be working again and you should see the web3.storage logo in the upper-left of the page 🥳 Replace it with your own logo if you like.
Authenticator.js
Create a /components folder in the root of the project. Inside that folder, create a file called Authenticator.js, and copy the following code into it (or copy the folder from the example app into the root of the new project).
import React, { useState } from "react";
import { useKeyring } from "@w3ui/react-keyring";

export default function Authenticator ({ children }) {
  const [{ space }, { createSpace, registerSpace, cancelRegisterSpace }] = useKeyring();
  const [email, setEmail] = useState("");
  const [submitted, setSubmitted] = useState(false);

  if (space?.registered()) {
    return children;
  }

  if (submitted) {
    return (
      <div>
        <h1 className="near-white">Verify your email address!</h1>
        <p>Click the link in the email we sent to {email} to sign in.</p>
        <form onSubmit={e => { e.preventDefault(); cancelRegisterSpace() }}>
          <button type="submit" className="ph3 pv2">Cancel</button>
        </form>
      </div>
    );
  }

  const handleRegisterSubmit = async (e) => {
    e.preventDefault();
    setSubmitted(true);
    try {
      await createSpace();
      await registerSpace(email);
    } catch (err) {
      throw new Error("failed to register", { cause: err });
    } finally {
      setSubmitted(false);
    }
  }

  return (
    <form onSubmit={handleRegisterSubmit}>
      <div className="mb3">
        <label htmlFor="email" className="db mb2">Email address:</label>
        <input id="email" className="db pa2 w-100" type="email" value={email} onChange={(e) => setEmail(e.target.value)} required />
      </div>
      <button type="submit" className="ph3 pv2" disabled={submitted}>Register</button>
    </form>
  );
}

/**
 * Wrapping a component with this HoC ensures an identity exists.
 */
export function withIdentity (Component) {
  return props => (
    <Authenticator>
      <Component {...props} />
    </Authenticator>
  );
}
Authenticator.js exports an HoC (Higher-order Component), withIdentity, which we will use to wrap our selfie component. It returns the component it wraps if the user is authenticated, otherwise it takes the user through the sign-in flow. Go through the login flow when prompted.

ContentPage.js
We now need to merge ContentPage.js from the example app into index.js of our new project, making some adjustments. You can copy the code below into index.js. Note: we renamed the function to Home, removed the css import, and adjusted the relative path for the import of withIdentity since Home lives in the pages folder rather than the components folder
import React, { useState } from "react";
import { useUploader } from "@w3ui/react-uploader";
import { withIdentity } from "../components/Authenticator";

function Home() {
  const [{ storedDAGShards }, uploader] = useUploader();
  const [file, setFile] = useState(null);
  const [dataCid, setDataCid] = useState("");
  const [status, setStatus] = useState("");
  const [error, setError] = useState(null);

  if (!uploader) return null;

  const handleUploadSubmit = async (e) => {
    e.preventDefault();
    try {
      setStatus("uploading");
      const cid = await uploader.uploadFile(file);
      setDataCid(cid);
    } catch (err) {
      console.error(err);
      setError(err);
    } finally {
      setStatus("done");
    }
  };

  if (status === "uploading") {
    return <Uploading file={file} storedDAGShards={storedDAGShards} />;
  }

  if (status === "done") {
    return error ? <Errored error={error} /> : <Done file={file} dataCid={dataCid} storedDAGShards={storedDAGShards} />;
  }

  return (
    <form onSubmit={handleUploadSubmit}>
      <div className="db mb3">
        <label htmlFor="file" className="db mb2">
          File:
        </label>
        <input
          id="file"
          className="db pa2 w-100 ba br2"
          type="file"
          onChange={(e) => setFile(e.target.files[0])}
          required
        />
      </div>
      <button type="submit" className="ph3 pv2">
        Upload
      </button>
    </form>
  );
}

const Uploading = ({ file, storedDAGShards }) => (
  <div className="flex items-center">
    <div className="spinner mr3 flex-none" />
    <div className="flex-auto">
      <p className="truncate">Uploading DAG for {file.name}</p>
      {storedDAGShards.map(({ cid, size }) => (
        <p key={cid.toString()} className="f7 truncate">
          {cid.toString()} ({size} bytes)
        </p>
      ))}
    </div>
  </div>
);

const Errored = ({ error }) => (
  <div>
    <h1 className="near-white">
      ⚠️ Error: failed to upload file: {error.message}
    </h1>
    <p>Check the browser console for details.</p>
  </div>
);

const Done = ({ file, dataCid, storedDAGShards }) => (
  <div>
    <h1 className="near-white">Done!</h1>
    <p className="f6 code truncate">{dataCid.toString()}</p>
    <p>
      <a href={`https://w3s.link/ipfs/${dataCid}`} className="blue">
        View {file.name} on IPFS Gateway.
      </a>
    </p>
    <p className="near-white">Chunks ({storedDAGShards.length}):</p>
    {storedDAGShards.map(({ cid, size }) => (
      <p key={cid.toString()} className="f7 truncate">
        {cid.toString()} ({size} bytes)
      </p>
    ))}
  </div>
);

export default withIdentity(Home);
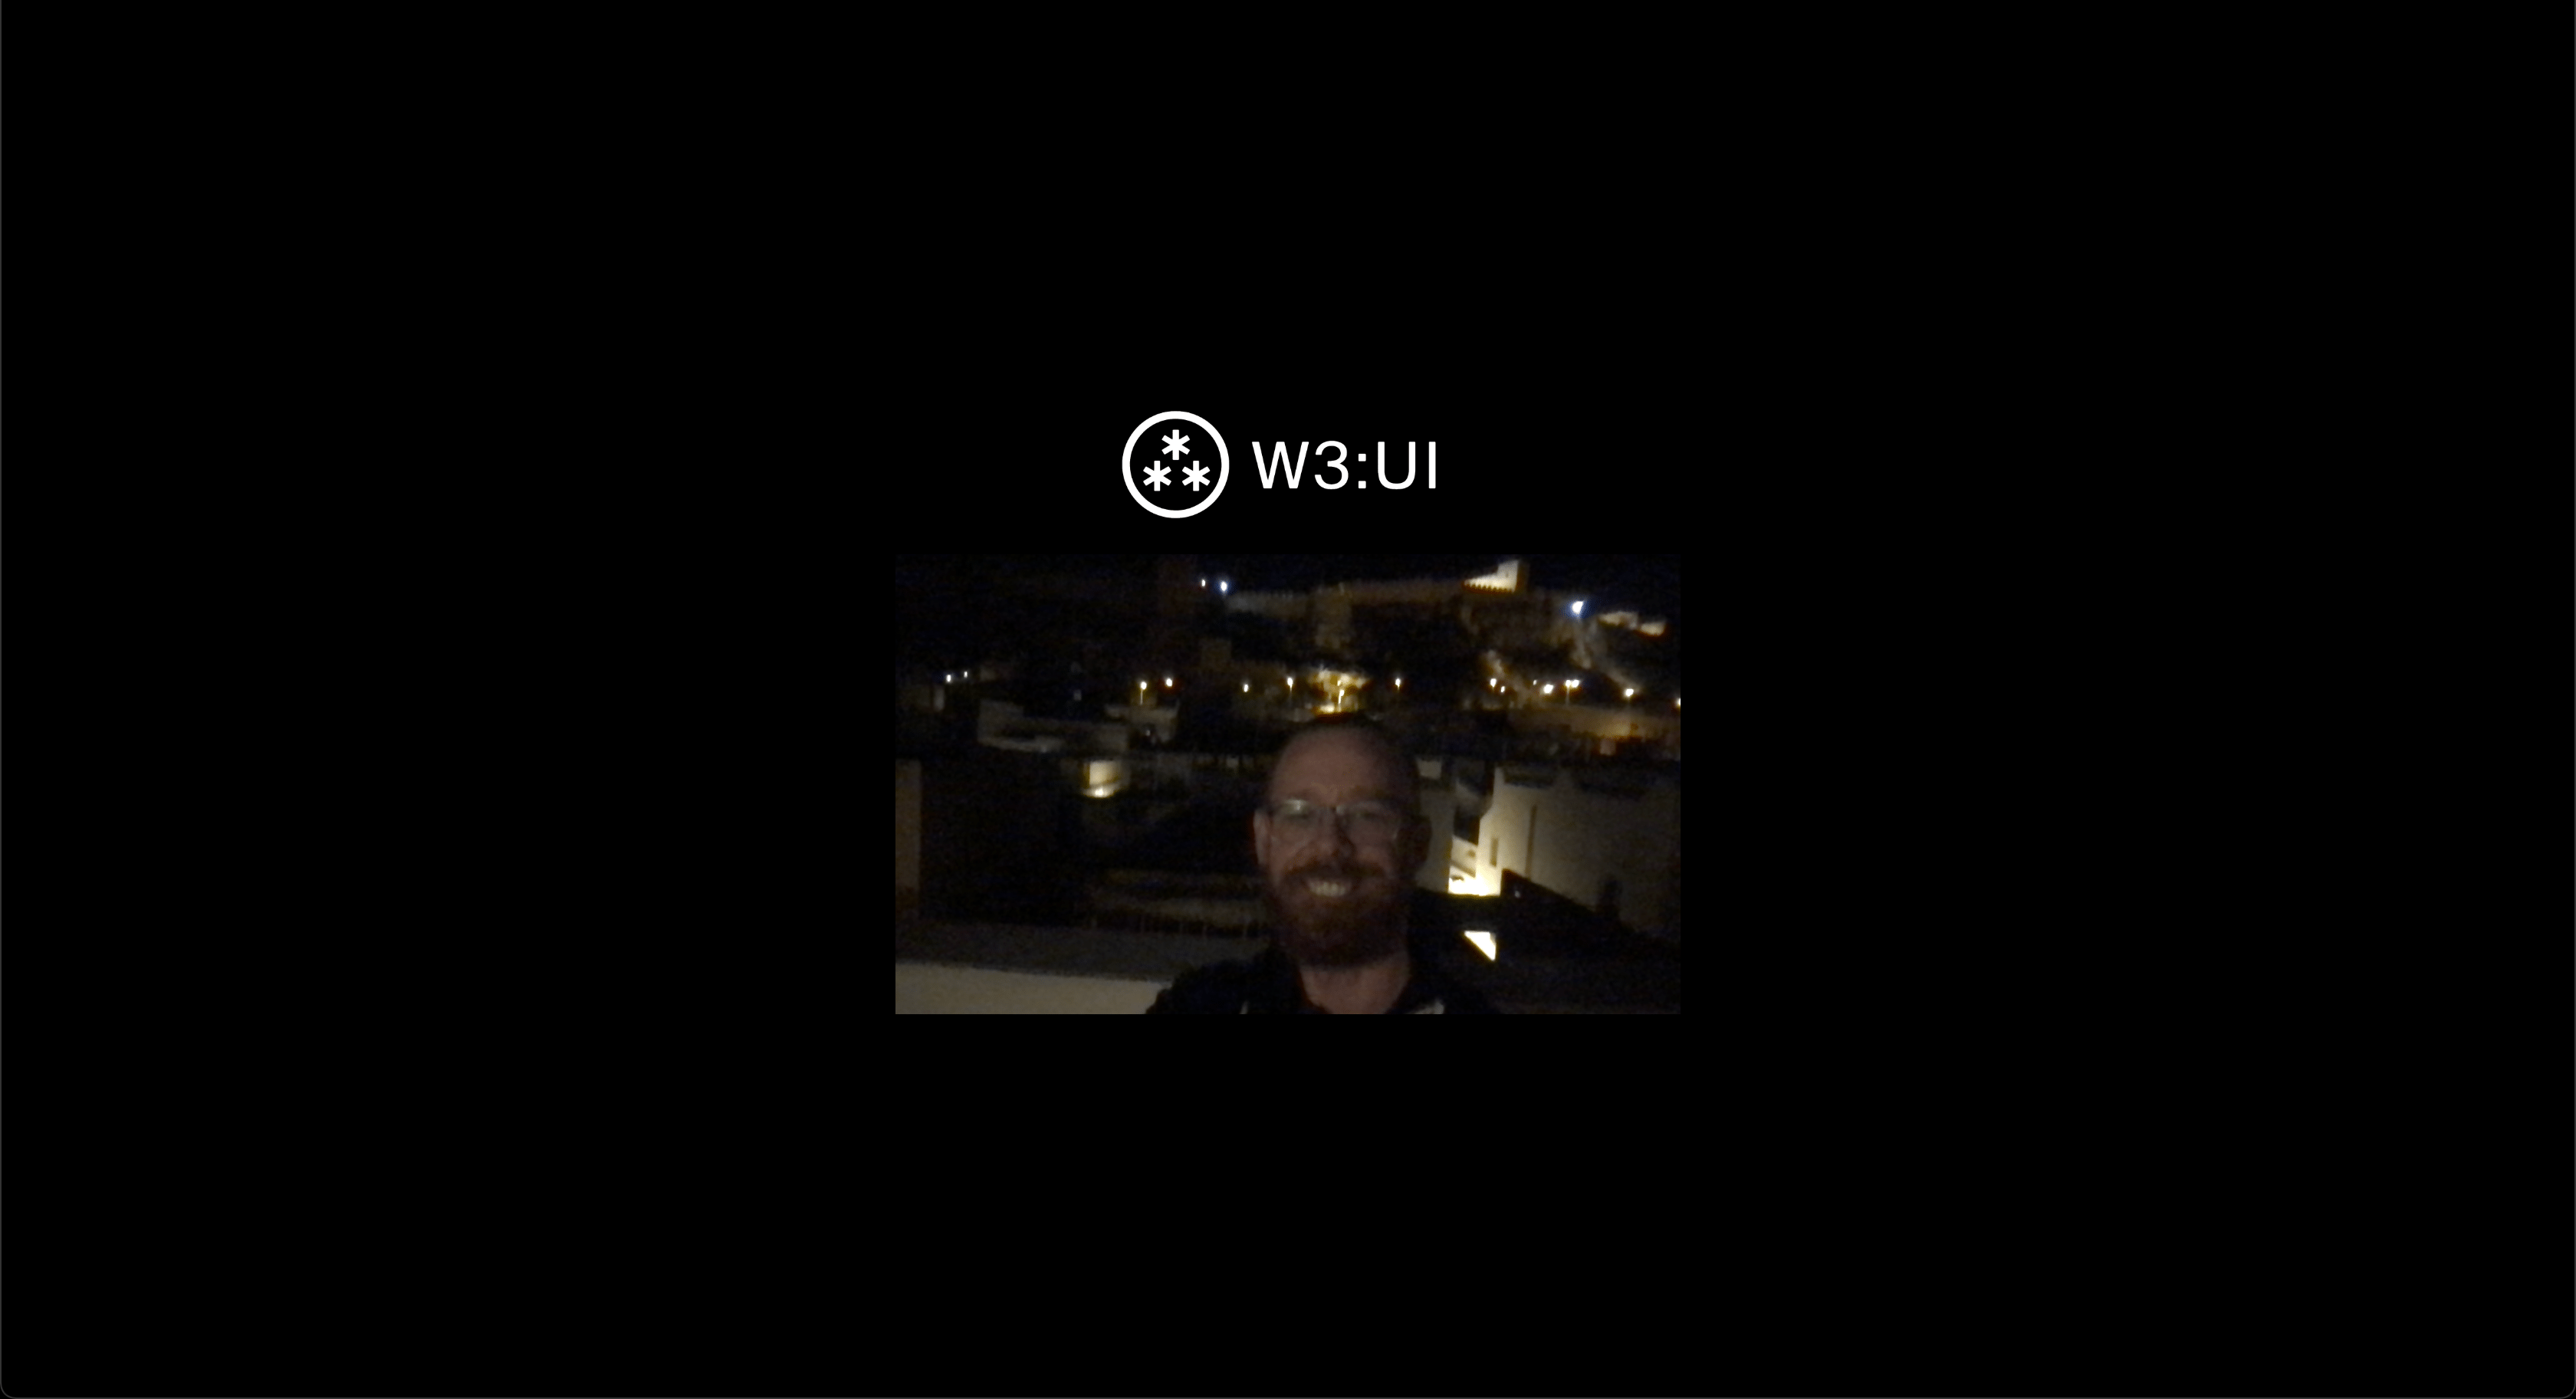
If you've followed to this point, the app should now be working! However, it should resemble this:

Css files
Copy spinner.css and tachyons.min.css into the /styles folder. spinner.css defines a spinner animation and tachyons.min.css is minified css for the Tachyons css framework, which makes use of utility classes.
Now go into _app.js and import the css files from /styles as is already done with globals.css.
import "../styles/tachyons.min.css";
import "../styles/spinner.css";
That's much better 🤩🤩🤩 The app should now be fully functional--try it out! Pro-tip: Be patient if you choose to upload a large file.

Modify the example by adding a camera and using w3ui to upload the selfies 💅📸 we take
Just a few modifications and we'll have our selfie app 💅📸 First, let's install the camera component.
yarn add react-camera-pro && yarn add styled-components
Now that we have a camera, let's wipe out our index.js and rebuild our UI and page functionality from scratch. Replace index.js with the following
import { useRef } from "react";
import { withIdentity } from "../components/Authenticator";
import { Camera } from "react-camera-pro";

export function Home() {
  const camera = useRef(null);

  return (
    <div className="relative">
      <div style={{ width: 300, height: 300 }}>
        <Camera ref={camera} />
      </div>
    </div>
  );
}

export default withIdentity(Home);
Now we've imported our camera and created a reference which will receive the mounted instance of the camera component. You should now see yourself in a live camera.
Let's add the ability to take pictures 📸 📸 and upload to IPFS!
First, we need to update our imports to include useState and useUploader (a custom hook provided by react-uploader). We'll use the former to store our images and status updates in state, the latter to upload our images to IPFS.
import { useState, useRef } from "react";
import { useUploader } from "@w3ui/react-uploader";
Now we'll add our state variables and the function that will take and upload photos (just beneath our camera ref).
const camera = useRef(null);
const [, uploader] = useUploader();
const [status, setStatus] = useState("");
const [error, setError] = useState(null);
const [images, setImages] = useState([]);

const printStatus = status === "done" && error ? error.message : status;

const takePhoto = async (e) => {
  e.preventDefault();
  const imgData = camera.current.takePhoto();
  try {
    // Build a DAG from the file data to obtain the root CID.
    setStatus("encoding");
    // use fetch to transform data URL -> blob -> file
    const theFile = await fetch(imgData).then((it) => it.blob());
    setStatus("uploading");
    const cid = await uploader.uploadFile(theFile);
    setImages([{ cid: cid, data: imgData }, ...images]);
  } catch (err) {
    console.error(err);
    setError(err);
  } finally {
    setStatus("done");
  }
};
Display our uploads 🤩
Finally, let's update our JSX to include a button that takes photos and displays the upload status:
return (
  <div>
    <p>
      <button style={{ cursor: "pointer" }} onClick={takePhoto}>
        Take photo
      </button>{" "}
      {printStatus}
    </p>
    <div className="relative">
      <div style={{ width: 300, height: 300 }}>
        <Camera ref={camera} />
      </div>
    </div>
  </div>
);
Now our app takes and uploads photos to IPFS! Say "cheese!" 📸😁

Displaying our images
The last thing we need to do is display our selfies for the world to see 💅 We'll do this using another w3ui component: Uploads List
yarn add @w3ui/react-uploads-list
Now we need to add the provider to _app.js like we did for the other w3ui components. Without it, we won't have access to our uploaded files! Import it and
import { UploadsListProvider } from "@w3ui/react-uploads-list";
return (
  <KeyringProvider>
    <UploaderProvider>
      <UploadsListProvider>
        <AgentLoader>
          <div className="vh-100 flex flex-column justify-center items-center sans-serif light-silver">
            <header>
              <img src="/logo.png" width="250" alt="logo" />
            </header>
            <div className="w-90 w-50-ns mw6">
              <Component {...pageProps} />
            </div>
          </div>
        </AgentLoader>
      </UploadsListProvider>
    </UploaderProvider>
  </KeyringProvider>
);
Now let's create a component that displays each of the images in our uploads list. Create the file ImageListItem.js in the /components folder and paste the following:
export default function ImageListItem({ cid, data }) {
  cid = cid.toString(); // allows us to accept both CID objects and strings
  if (/bagb/.test(`${cid}`)) {
    return <li key={cid}>CAR cid: {cid}</li>;
  }
  const imgUrl = `https://w3s.link/ipfs/${cid}`;
  const imgSrc = data || imgUrl;
  return (
    <li key={cid} className="dib mh2">
      <a href={imgUrl}>
        <img width="200px" alt="camera output" src={imgSrc} />
      </a>
    </li>
  );
}
Import the ImageListItem component into index.js and use it as follows... We'll grab our data with useUploadsList, another custom hook from w3ui.
import { useUploadsList } from "@w3ui/react-uploads-list";
const camera = useRef(null);
const [, uploader] = useUploader();
const [status, setStatus] = useState("");
const [error, setError] = useState(null);
const [images, setImages] = useState([]);

const [{ data: listData }, { next: listNext }] = useUploadsList();

// load the first page of uploads
useEffect(() => {
  listNext();
}, []);

const printListData = listData || [];
return (
  <div>
    <p>
      <button style={{ cursor: "pointer" }} onClick={takePhoto}>
        Take photo
      </button>{" "}
      {printStatus}
    </p>
    <div className="relative">
      <div style={{ width: 300, height: 300 }}>
        <Camera ref={camera} />
      </div>
    </div>
    <ul className="list">
      {images.map(({ cid, data }) => (
        <ImageListItem key={cid} cid={cid} data={data} />
      ))}
      {printListData.map(({ root: cid }) => (
        <ImageListItem key={cid} cid={cid} />
      ))}
    </ul>
  </div>
);
One last touch with Tachyons: in _app.js, add pt5 to the className of the first div and h-100 to the child div, adding top padding to the app layout and making the page full height.
  <AgentLoader>
    <div className="vh-100 pt5 flex flex-column justify-center items-center sans-serif light-silver">
      <header>
        <img src="/logo.png" width="250" alt="logo" />
      </header>
      <div className="w-90 w-50-ns mw6 h-100">
        <Component {...pageProps} />
      </div>
    </div>
  </AgentLoader>
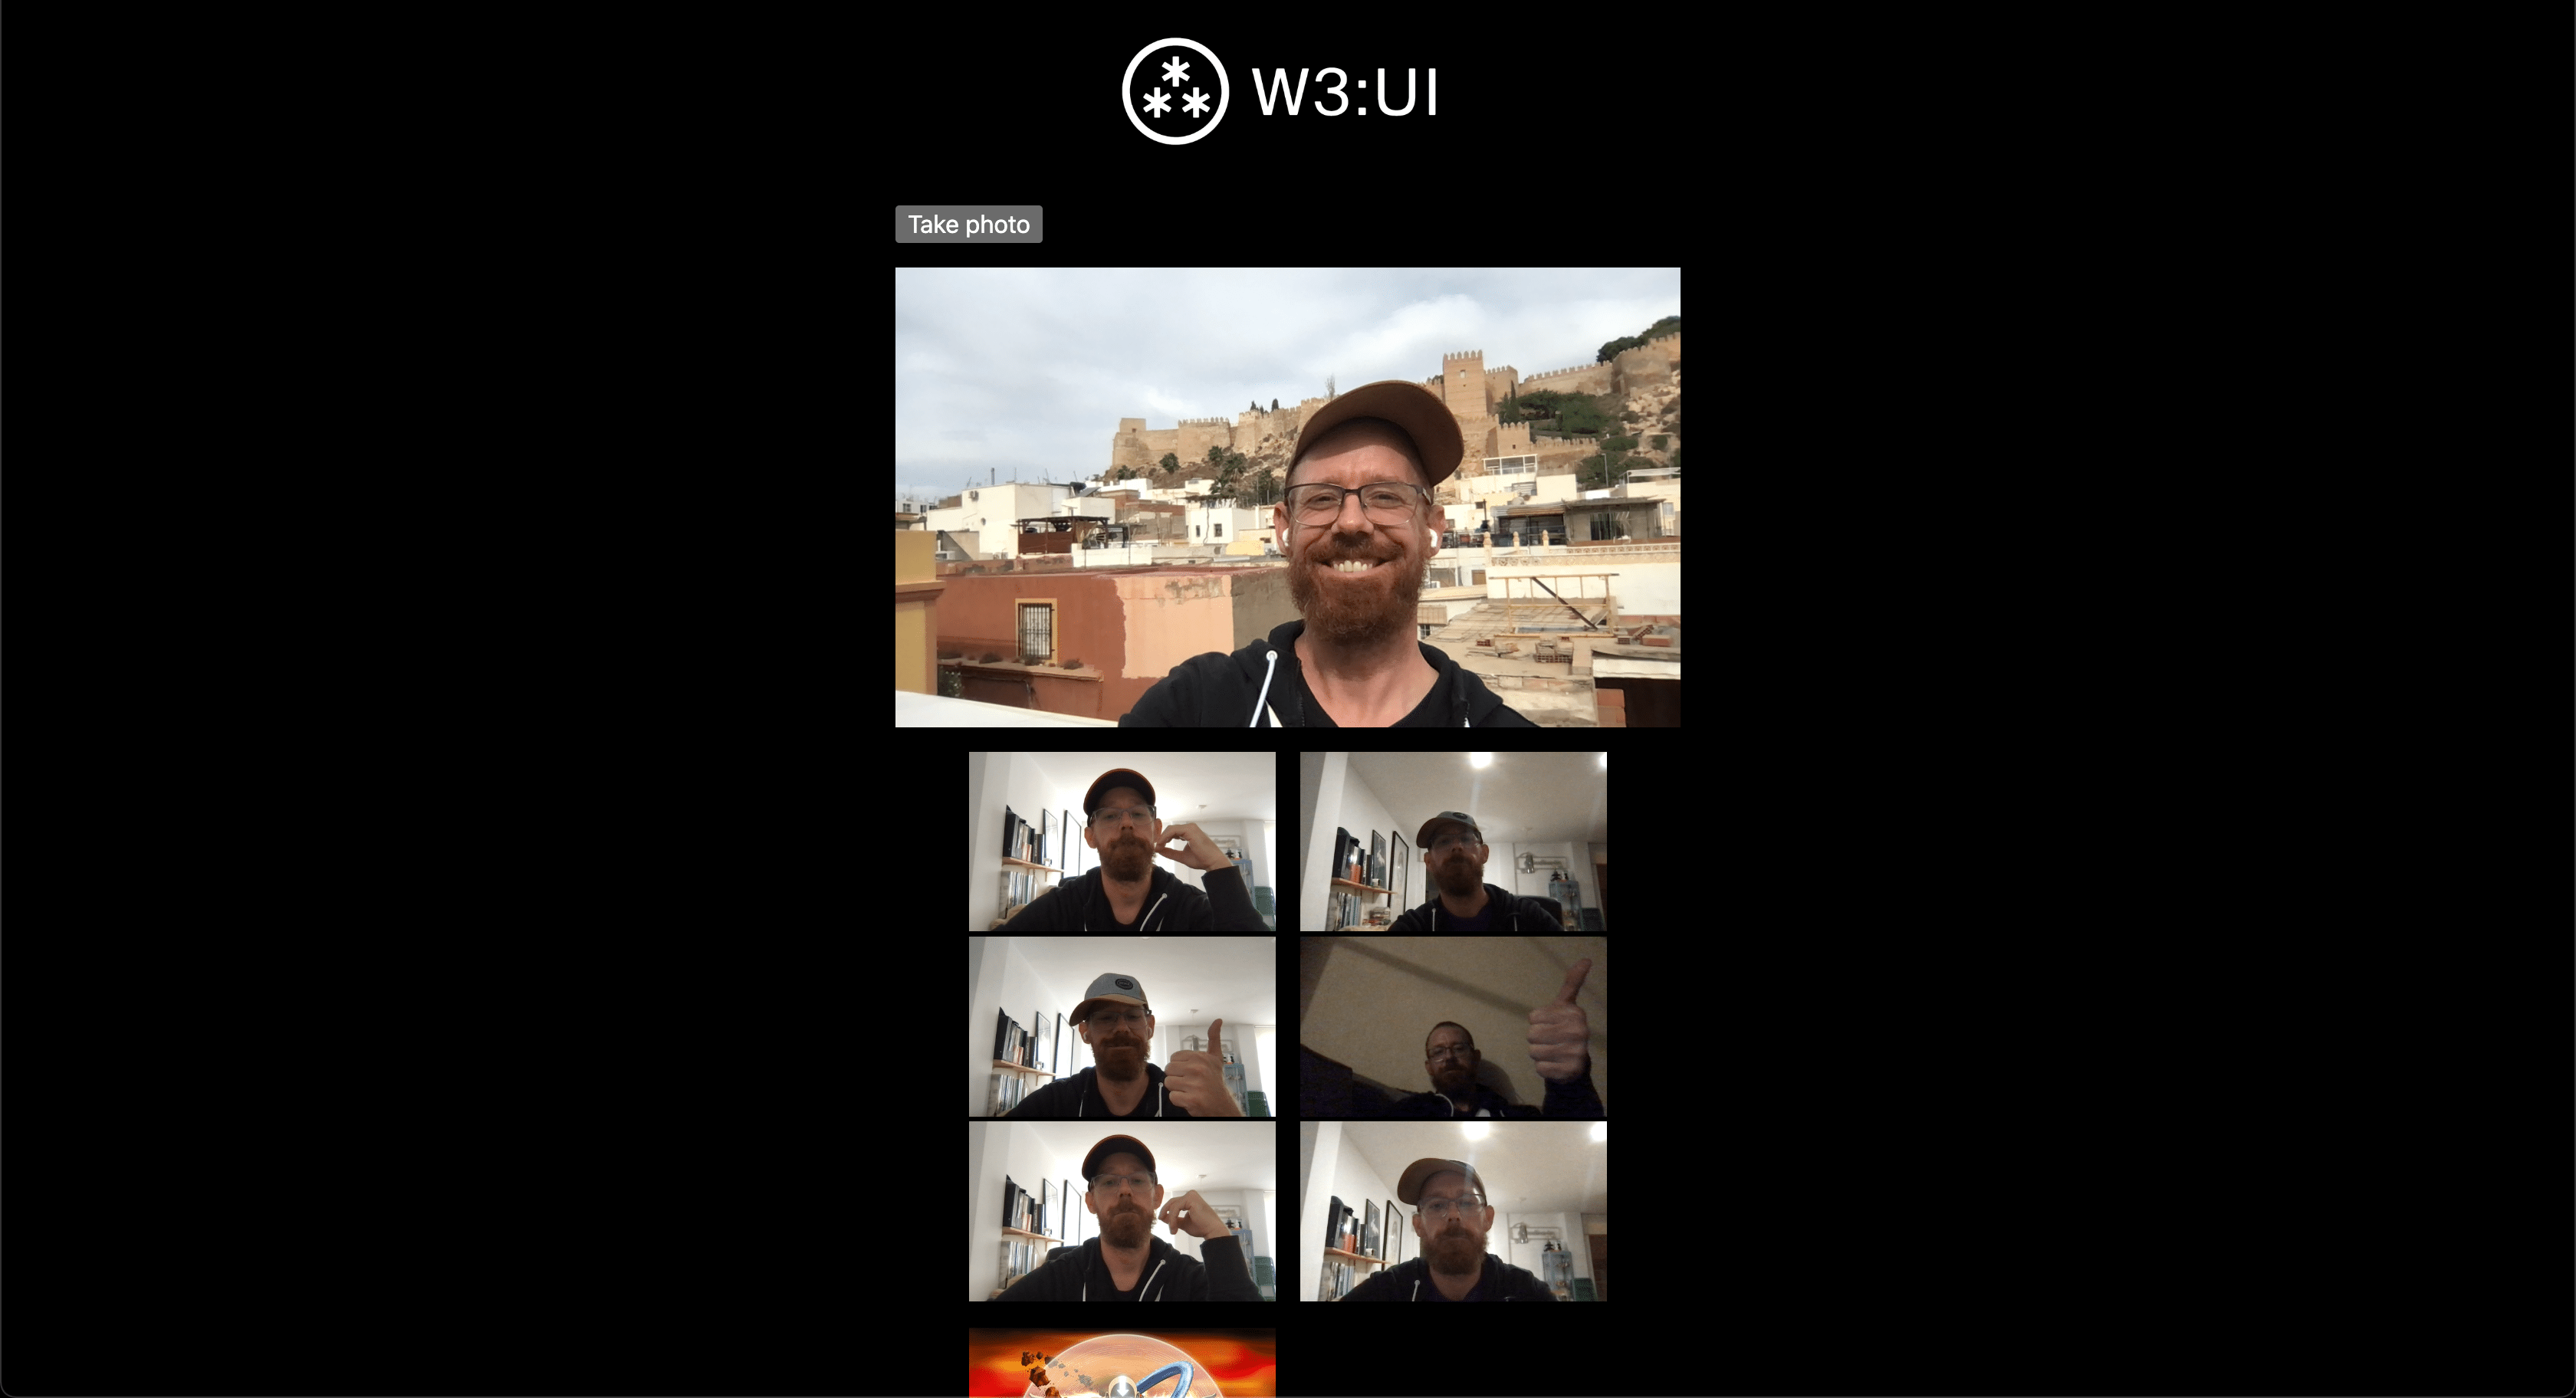
That's it! We now have a fully-functioning and stylish, selfie app 💅📸! The final product should look like this:
And here is the final state of index.js
import { useState, useRef, useEffect } from "react";
import { Camera } from "react-camera-pro";
import { useUploader } from "@w3ui/react-uploader";
import { useUploadsList } from "@w3ui/react-uploads-list";

import { withIdentity } from "../components/Authenticator";
import ImageListItem from "../components/ImageListItem";

export function Home() {
  const camera = useRef(null);
  const [, uploader] = useUploader();
  const [status, setStatus] = useState("");
  const [error, setError] = useState(null);
  const [images, setImages] = useState([]);

  const [{ data: listData }, { next: listNext }] = useUploadsList();
  // load the first page of uploads
  useEffect(() => {
    listNext()
  }, [])

  const printListData = listData || []
  const printStatus = status === "done" && error ? error.message : status;

  const takePhoto = async (e) => {
    e.preventDefault();
    const imgData = camera.current.takePhoto();
    try {
      // Build a DAG from the file data to obtain the root CID.
      setStatus("encoding");
      // use fetch to transform data URL -> blob -> file
      const theFile = await fetch(imgData).then((it) => it.blob());
      setStatus("uploading");
      const cid = await uploader.uploadFile(theFile);
      setImages([{ cid: cid, data: imgData }, ...images]);
    } catch (err) {
      console.error(err);
      setError(err);
    } finally {
      setStatus("done");
    }
  };

  return (
    <div>
      <p>
        <button style={{ cursor: "pointer" }} onClick={takePhoto}>
          Take photo
        </button>{" "}
        {printStatus}
      </p>
      <div className="relative">
        <div style={{ width: 300, height: 300 }}>
          <Camera ref={camera} />
        </div>
      </div>
      <ul className="list">
        {images.map(({ cid, data }) => (
          <ImageListItem key={cid} cid={cid} data={data} />
        ))}
        {printListData.map(({ root: cid }) => (
          <ImageListItem key={cid} cid={cid} />
        ))}
      </ul>
    </div>
  );
}

export default withIdentity(Home)
We hope you had fun. Stay tuned for more tutorials using w3ui to build awesome stuff! And once again don't hesitate to reach out with questions or thoughts! Happy coding.
Full demo code here


